 We have built many paludaria, for those that are unfamiliar with the term, this is a glass constructed terrarium that has an aquarium at the bottom, a land area and then a planted wall to the rear of the terrarium. This allows communal living of compatible aquatic, semi-aquatic and arboreal species altogether in one enclosure. There are some hobbyists that frown on such an enclosure, but it can be done, and now with Zoo Med providing a full range of products designed for this one purpose it has become easier than ever. Perhaps for the more advanced experienced keeper, but it can be done- and very successfully.
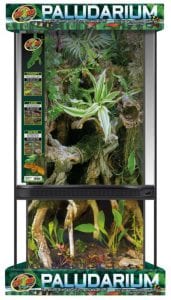
Zoo med have brought to market two tall Paludaria, one is 30x30x60cm, the other is 45cmx45cmx90cm. We set up the larger one using their filter and lighting 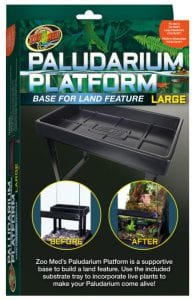 system and the land base.
The Paludarium filter system is easy to install, we did this first. It fastens in the corner by suction cups, the mains lead is fed to the top of the paludarium – the cable will be hidden once the plants are installed. Much can be said for Zoo Med Paludarium water heater if this is fitted too. Next place the land base, on its feet into the bottom of the Paludarium giving a land area to the rear. Gravel in the bottom of the paludarium, some weighted aquatic plants and perhaps some natural looking décor and the aquarium job is done. We laid a layer of about 20mm of Lucky Reptiles Hydroballs for drainage, then applied a membrane fabric and then a good quality planting medium on top (we used Arcadia EcoEarth). The base could do with being deeper, the next one I do I may drill drainage holes into the base, so it can drain into the aquarium – that way allowing deeper planting medium (it would 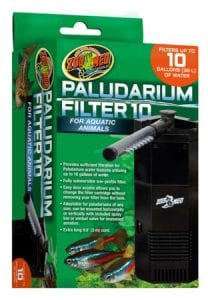 need a membrane fabric to stop the planting medium escaping into the aquarium with the draining water). We planted tall plants at the back, smaller to the front – and a couple of climbers that will creep along the branches and vines we also added. Bromelia were fastened with cable ties to the branches. We would have liked to seen Zoo Med provide a living wall as part of their Paludarium system. In its absence the next one we build
 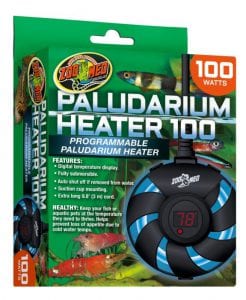 we would make a wall from expanding foam – more on the topic another day!
Lighting is very easy to install, we used the Paludarium UVB & Plant Growth Lighting Kit sat on the mesh top of the paludarium. This provides lighting for the plants and a UVB for basking animals. We, didn’t particularly plan any arboreal lizards or similar in this build, but if we did we would have tried to install a better basking heater system, maybe using the Zoo med Nano heating and lighting system – an experiment for another day.
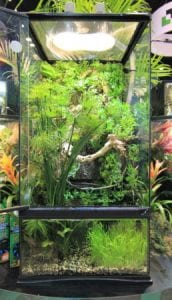
It was a very quick build, and OK the results were not as good as one of our customer natural terraria builds, but it still looked very, very good. Suddenly the hobby of paludaria building has gone mainstream and its as good a starting point as anything. If you are good with your hands, with some basic knowledge you’ll get a better end result with your own build – but wow! We loved the finished article using Zoo meds Paludarium system, so easy!